Thursday, 3 March 2016

Remembering Steve Sykes

I've recently heard of the sad passing of Steve Sykes, who was a group member until he moved away from the area some years ago.


Steve's forte was in scratchbuilding wagons, particularly of pre-grouping prototypes and he was often seen on the 2mm association demo stand at exhibitions working on his latest wagon using his trademark cream plastikard.


He was always willing to share his skills, and we start with a picture from the archives from 2006 of Steve demoing his techniques at a Pennine Group meeting when we used to meet in Todmorden -


One of Steve's trademarks was that when building the wagons he used cream plastikard for wooden-bodied prototypes, on the basis that it was a much closer colour to wood than the usual white plastikard generally available, or the kinds of plastics used for injection-moulded kits.

Here's a few of his wagons in their unpainted state, with the ironwork made from white microstrip -


He also used a fine 'scrawker' to scribe out the planking, which he marked out on by pencil on the plastikard prior to cutting it much in a similar manner to lino cutting. The result was a technique that was able to accurately model a wide variety of prototypes with a great degree of fidelity as often the initial marking out could be done using either drawings or photographs of the prototype.

He also had great skill in painting and finishing the wagons, which were often hand lettered, as the next couple of photographs will hopefully show.


His choice of prototypes was quite cosmopolitan, firstly this is a set of SE&CR wagons - 

  
..and this is an older photo from 2003 of some Metropolitan Railway wagons -


Hopefully this short retrospective of the photos that I have of his work will serve as a tribute to Steve.
 
He will be missed by many of us in the group, and our condolences go out to his family and friends.


Tuesday, 9 February 2016

New Year - New Venue - New Legs?

Well, for 2016 the Pennine Area Group has now moved to a new venue, still in Keighley but now at the Aire Valley Railway Modellers - a new group, initially specialising in the smaller gauges, that was formed out of former members of Keighley MRC.

The new clubrooms are on the third floor of a mill near Keighley Station and whilst still being fitted out we will have more space and less need to move the layout around for open days.

Sadly it does also mean we'll need a new test track that sadly will be smaller than the one that used to be at Keighley MRC - a folding circular one is being planned with the idea that this can also be used at exhibitions.

Lightcliffe was moved to the new clubrooms early this year, and as part of the moving process a few issues with the current leg setup for the main boards were found.

It's not that there's anything wrong with the legs, however the current use of wood screws to secure the legs and also the diagonal cross-members to the boards needs some re-thinking.

Firstly, for bolting the legs to the baseboards, I am proposing that we use bolts that can be tightened up with Allen Keys - not unlike those preferred by a certain Swedish Furniture Retailer that I term 'IKEA Bolts' in the lack of any better name. Secondly, for new diagonal cross-braces I propose a much lighter arrangement, with planks, possibly laminated with strips of Ply for strength, secured to the bolt using these B&Q Mini-mounts, shown with the bolts -


These will be trialled on one of the boards before fitting them to the rest.

In other news I've been working on completing an O Gauge Coal Tank started by our late friend Alan Pollock - 


There is some way to go yet - some of the parts from the kit were missing and need fabricating from raw brass, such as the cab roof and coal rails - it'll all be useful experience though. Also, I have a bag full of white metal fittings to complete it, including some replacement cast splashers to replace the etched brass ones in the kit.

Sunday, 20 December 2015

A morning on the tiles

Lightcliffe 'box is just about finished ... just the nameplate to go now.


Sunday, 8 November 2015

Adding some colour to proceedings

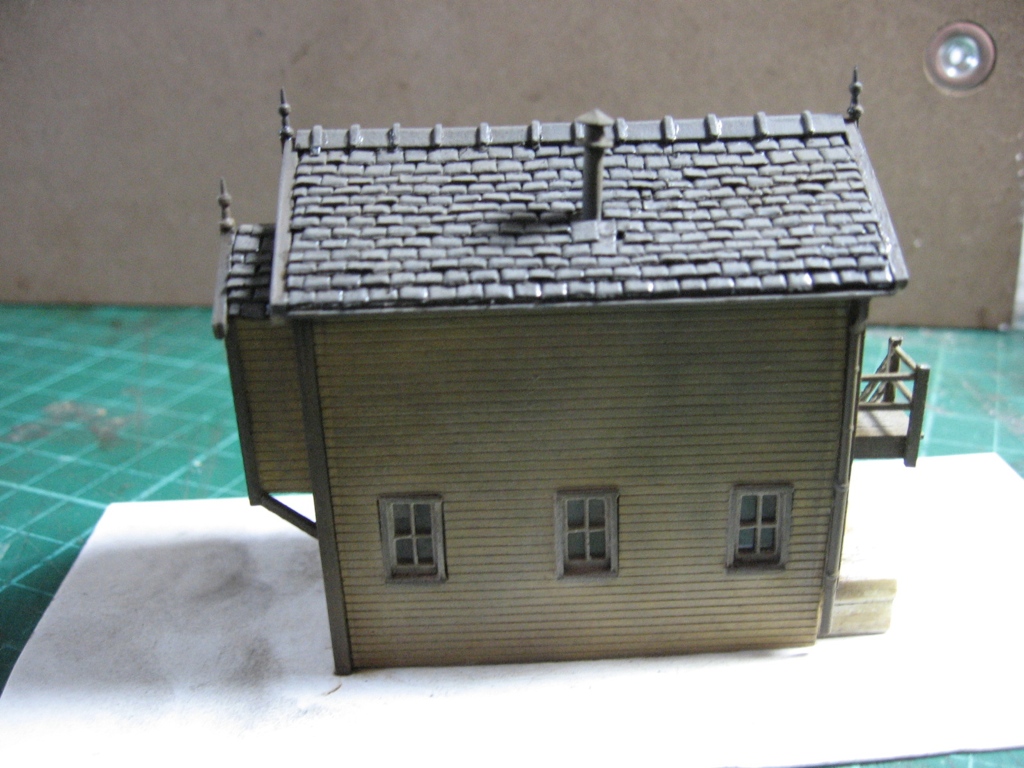
A busy day with paints (Vallejo Model Colour acrylics) and powders (PanPastel) and Lightcliffe signal box now has a bit of colour in its cheeks.


Next job is to add the glazing to the windows.

Also discovered today that Andrew Stadden has now started producing some of his Victorian/Edwardian figures in 2mm scale - http://www.acstadden.co.uk/Pages/2mmftFigures.aspx

Have ordered a couple of packs and will report back on them when they arrive - look very nice on the photos and if they're anything like Andrew's larger scale figures, they'll be just the job for my Coniston layout ... the signal box for which is also in the paintshop at the moment but isn't very photogenic.

Sunday, 1 November 2015

Lightcliffe Signal Box - painting decision made and undercoat applied

Right ... balcony brackets refined, side boards added to the balcony to disguise wonky boards and undercoat applied.

Toilet roof will have to be re-tiled as the slate slips didn't take too kindly to a bath in my ultrasonic cleaner and a couple of solder balls have had to be replaced but otherwise the box is now redy for the painters.

LMS painters are in very short supply and have a lot of work to do though so the box will be appearing in L&Y livery - not quite sure how tired a finish to go for yet, will see once the base colours are on.


Sunday, 25 October 2015

Just how efficient were the LMS at repainting signal boxes?

Evening all,

Been a bit grotty this weekend, so didn't manage to get to the group meeting yesterday, but the weekend wasn't a total write off modelling wise as I managed to make some more progress with Lightcliffe signal box.

The walls are just about finished, and the front and end walls have now been affixed to the sub-base (which will eventually be hidden by the platform). The window cleaner's balcony and protective railings have been added to the front and toilet end wall as well (the balcony appears to have been extended around the corner onto the door end wall when the staircase was moved sometime after 1938 but whilst the staircase ran down the side of the end wall it stopped at the end of the front wall.

The internal floor has also been completed with the lever frame painted up and basic furniture added but needs toning down a bit and then the internal walls need painting and some detail adding.

There are a few minor things that need tidying up but otherwise I'm almost ready to apply some primer ready for painting. Thing is though, I'm still not sure what colours to paint it in. The layout's set in the 1930s but I quite fancy applying a bit of modeller's licence and painting the box in L&Y colours and pretending that the LMS painters have been busy elsewhere and haven't quite got to Lightcliffe yet!

Will have to take some soundings on that methinks ...

Anyway, here's a few more progress shots including some cruel close ups to show the window cleaner's balcony (very fiddly to do and the cause of some rather choice language this afternoon).


Monday, 12 October 2015

Further progress on Lightcliffe 'box

OK ... really just a series of build photos showing my rather laborious construction techniques.

Front wall panels with lower windows ready for fitting after holes have been opened out.

And with windows fitted.

Rear wall, massively over height for the moment. The box was built on an embankment and was lower at the back than it was at the front, but I haven't been able to find any photographs of the rear of the box yet and the drawings I've been working off are for a standard L&Y box.

Beginnings of the door end wall.

Window frames being assembled.

Basic door end wall complete (staircase to be added).

Trial fit of end and front walls.

Toilet end wall.

Finials - two for the main roof and one for the toilet roof - made out of 0.75mm square rod with a Ratio top and a 0.76mm solder ball on the bottom).

Toilet roof tiled using slate slips cut into 2mm squares and with finial affixed.

Lever frame under construction.

Staircase fitted to door end wall (mix of Plastruct and scratchbuild and very fiddly).

And another trial fit of the front wall and the door end wall.

Next job is to get the interior done and then it's on with the roof.

See you next time.